
-
-
The E3D v6 should have been assembled already. It fits into the groovemount adapter as shown. It's best to turn it so the heat block is not too close to the fan shroud.
-
-
-
Use the hotend retainer (a small printed part) to fasten in the E3d v6 using (2) m3 x 30mm button head bolts.
-
-
-
Insert a length of PTFE into the hotend, at least 91mm long. (You want around 45mm sticking out of the hotend when it's fully seated)
-
-
-
Place the bowden coupler in the BMG mount
-
Slide the bowden tube onto the PTFE, and fit the BMG into the extruder mount
-
Trim down the ptfe slightly, until the BMG fits correctly in the mount - You want the ptfe tube as long as possible, so it's fully seated in both the hotend, and the BMG. The PTFE should end up with around 41mm sticking out of the hotend)
-
-
-
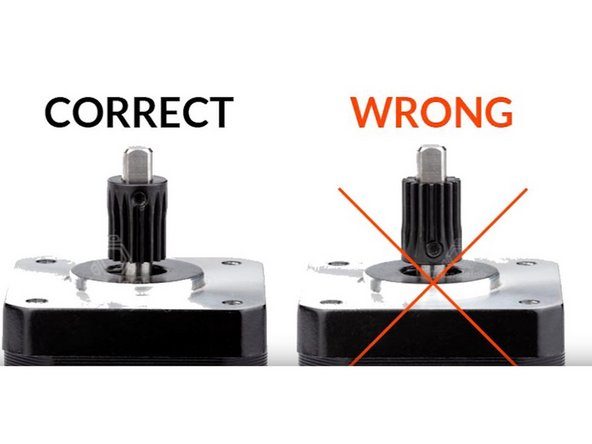
Attach the BMG toothed gear onto the pancake stepper motor.
-
Fit the stepper motor through the BMG (it helps to take the front off of the BMG)
-
-
-
Fasten the BMG and stepper together on the extruder mount using (3) M3 x 35mm bolts. (These bolts come with the BMG)
-
-
-
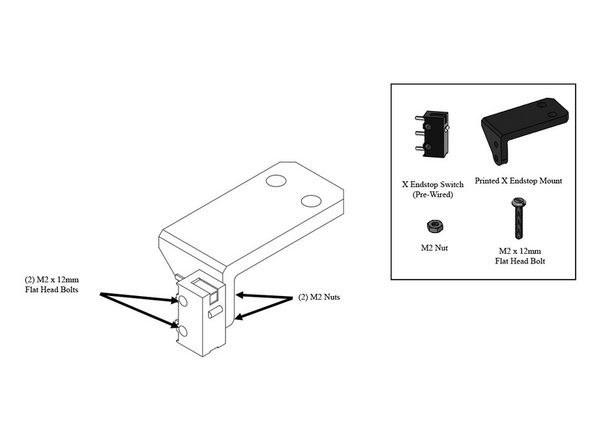
Attach the X Endstop (it comes pre-wired) to the printed X Endstop Mount using (2) M2 x 12mm Flat Head Bolts and (2) M2 Nuts
-
Don't worry about the wire for now, it's routed later.
-
-
-
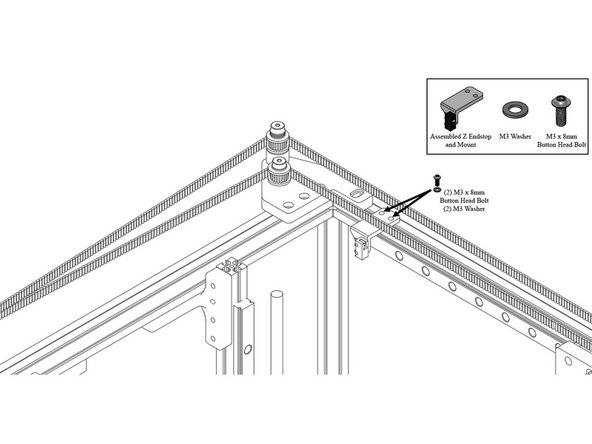
Mount the X endstop to the rear left corner of the frame, on the top Extrusion, using (2) M3 x 8mm Button Head Bolts and (2) M3 Washers.
-
Don't worry about exact placement for now, it will be adjusted later.
-


Cancel: I did not complete this guide.
16 other people completed this guide.