
Introduction
It's assumed that you're building a kit from Filastruder, and you've completed all previous sections. At the end of this section you should have a complete frame assembled for your RailCore.
-
-
Use (1) M3 x 8mm socket head screws to attach each of the (4) 270mm upright extrusions to the corner cubes on the bottom frame assembly.
-
-
-
Insert acrylic spacers in all extrusion channels facing the outside of the frame. Each extrusion has two outer facing channels.
-
In the layout shown in the second image, insert the acrylic spacer inserts and M3 nuts in all 8 of the outer facing channels. There should be (2) 5mm spacers, (3) 81mm spacers, and (4) M3 nuts in each channel.
-
Insert (2) M3 nuts in each of the remaining 8 channels.
-
-
-
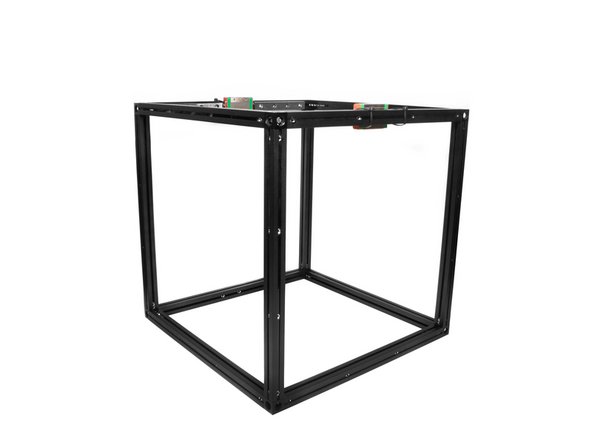
Use (4) M3 x 8mm Socket Cap Head Screws to attach the top extrusion assembly to the upright extrusions.
-
Be sure both the bottom and top frame pieces are in the right orientation. The top right extrusion should have (13) M3 nuts in it's top channel. The bottom right extrusion should have (10) M3 nuts in it's top channel.
-


Cancel: I did not complete this guide.
One other person completed this guide.