Difficulty
Moderate
Steps
7
Time Required
- O) Electronics 7 steps

In Progress
This guide is currently being written. Reload periodically to see the latest changes.

Private
This guide will not appear in search results and can only be viewed by team members!
Quiz
0
-
-
THE RAILCORE IS A “DIY” PROJECT - BUILD SAFE, BUILD SMART, AND BE RESPONSIBLE.
-
BUILD AT YOUR OWN RISK
-
WHEN IN DOUBT, DOUBLE CHECK THINGS.
-
3D PRINTERS CAN GET VERY HOT, USE COMMON SENSE AND QUALITY COMPONENTS.
-
If you need help find us at the RailCore Facebook page, or RailCore Discord channel. Both are linked from RailCore.org
-
-
-
Attach the PSU using (4) M4 x 10mm Button Head Bolts. The bolts go through holes in the right panel, and into the back of the PSU.
-
Be sure to install the PSU so the wiring terminals are to the bottom of the printer.
-
-
-
Install the SSR as shown.
-
Each hole is held in place using (1) m3 x 10mm Button Head Bolt.
-
Use a washer both on the SSR side, and on the back of the panel.
-
Fasten with an m3 Washer
-
-
-
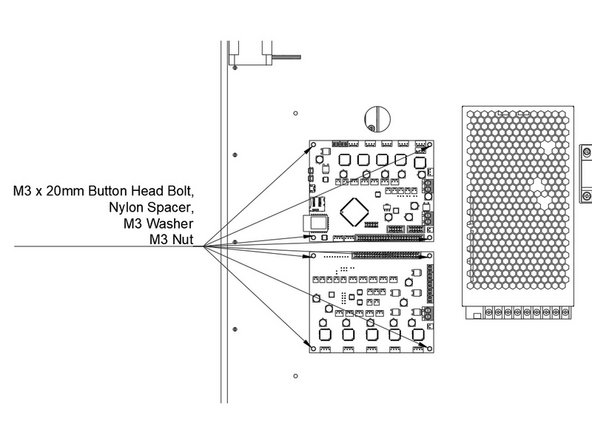
Attach the duet and Duex5
-
Be sure the Duet is on top, Duex5 is on bottom.
-
Pay careful attention to the orientation.
-
Mount them by putting one M3 x 20mm bolt through the board. Put the black nylon 5mm tall spacer behind the board.
-
Pass the bolts through the panel, attach with an m3 Washer and M3 nut.
-
-
-
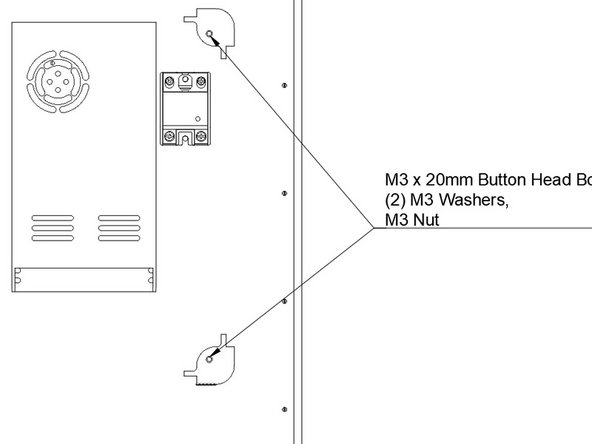
Attach the two rear Ebox Corners
-
Use an m3 x 20mm Button Head Bolt and Washer.
-
Pass them through the short side of the Ebox corner, and through the right panel.
-
Fasten with an m3 washer and m3 nut.
-
-
-
Install the Power Switch / Plug module into the rear Ebox Panel
-
Pass the wiring already attached to the plug through the panel.
-
Insert (2) m3 x 12mm Tapered head bolts through the switch and panel.
-
Fasten using an m3 washer and m3 nut.
-
-
-
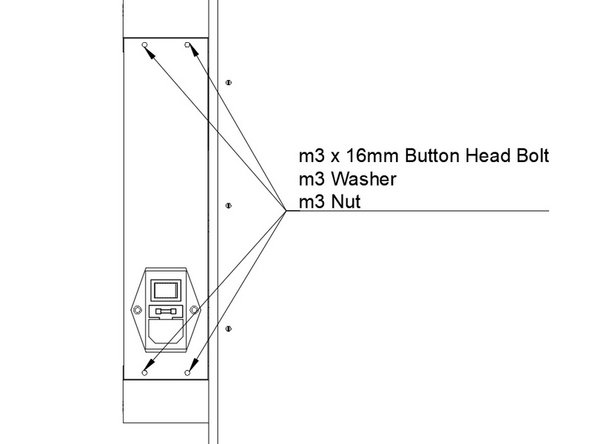
Install the Rear Ebox panel onto the Ebox corners you've installed
-
Pass an m3 x 16mm Button Head Bolt through each of the panel holes
-
Fasten each bolt using an m3 washer and m3 nut.
-