Difficulty
Moderate
Steps
8
Time Required
- K) Y Carriage 8 steps

In Progress
This guide is currently being written. Reload periodically to see the latest changes.
Quiz
0
-
-
Before you bolt the Y Carriage onto the Y rail, double check that all the brass inserts are in.
-
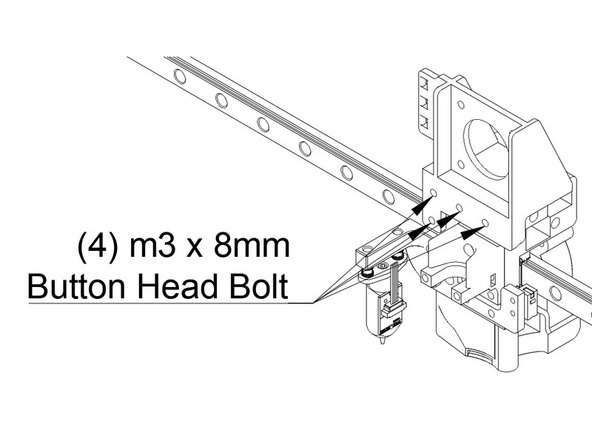
Bolt the Y Carriage to the Y rail using (4) m3 x 8mm button head bolts. Make sure they're snug.
-
You may want a dab of loctite on the bolts for attaching the Y carriage to the Rail, they're hard to get to later.
-
-
-
Put (2) m3 x 16mm Button Head Bolts pointing up through the holes in the BLTouch.
-
Thread a brass insert down on the bolt, tight against the bltouch.
-
Pass the bolt up through the BLTouch mount
-
Put an m3 washer on the bolt, and then an m3 Nylock Nut.
-
-
-
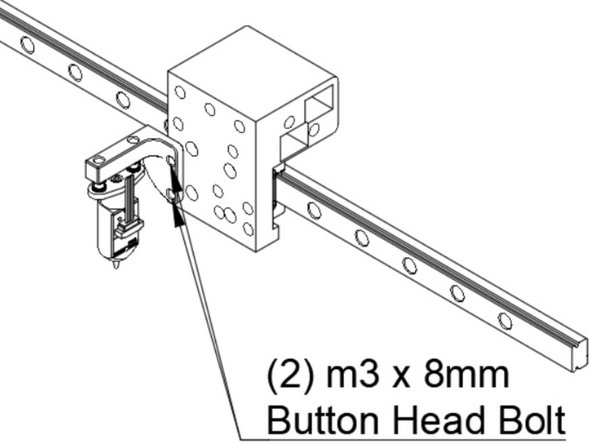
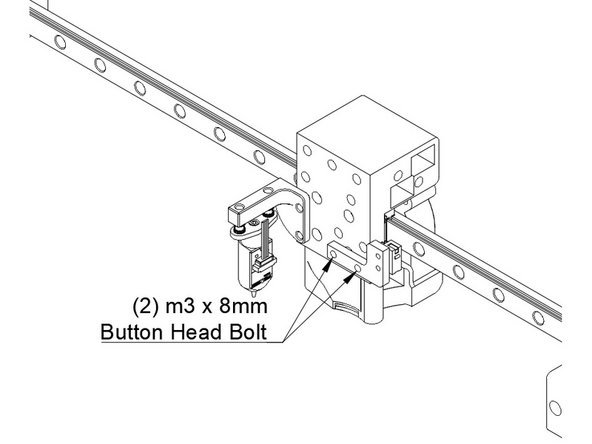
Attach the BLTouch mount to the lower left two holes in the Y carriage using (2) m3 x 8mm Button Head Bolts.
-
-
-
The Y endstop and part cooling fan share a cable harness, so we need to install them at the same time.
-
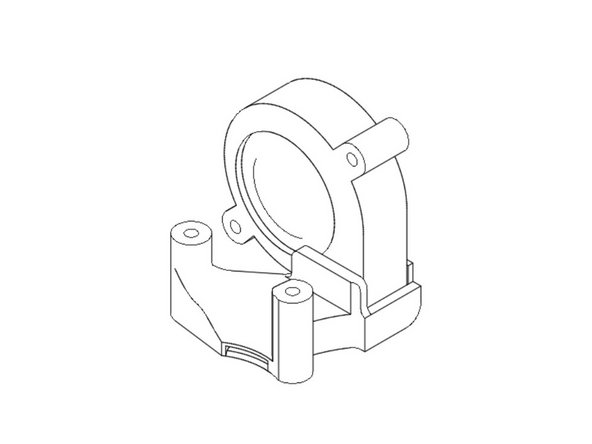
Start by inserting the 5015 Blower fan into the layer shroud. It just fits a bit loosely, don't break anything cramming it in.
-
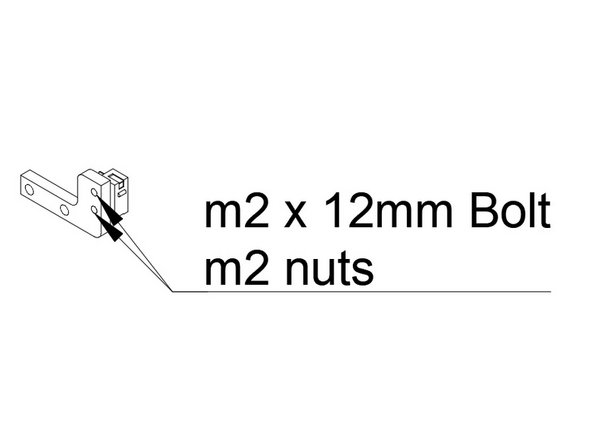
Attach the Y endstop switch to the Y endstop mount using (2) m2 x 12mm Bolts and (2) m2 nuts.
-
-
-
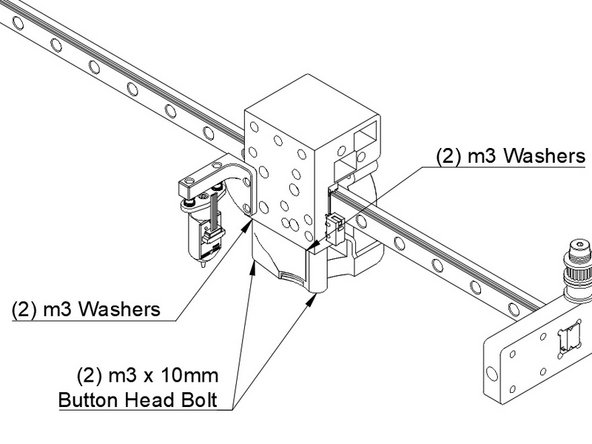
Start by attaching the Layer fan and shroud. Two m3 washers serve as spacers on each bolt for the shroud, between it and the Y carriage. Attach the shroud using (2) m3 x 10mm button head bolts to the brass inserts in the bottom of the Y carriage.
-
Attach the Y endstop mount to the bottom right two holes in the Y carriage using (2) m3 x 8mm Button Head Bolts
-
-
-
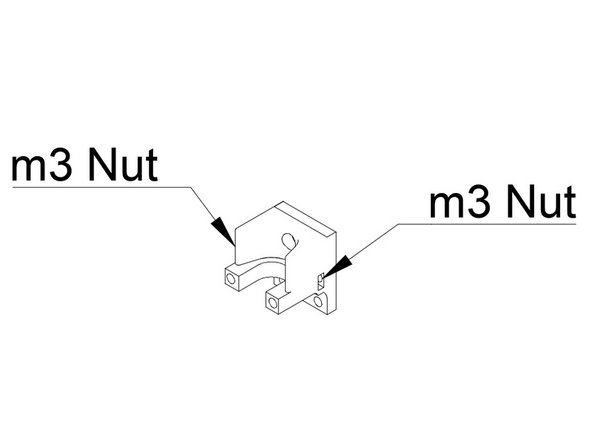
Insert one m3 nut into each side of the printed hotend mount. They can be hard to push in, using a screwdriver can help.
-
Push an allen wrench down through the bolt holes for attaching the hotend to center the M3 nuts, it will make threading a bolt in easier.
-
-
-
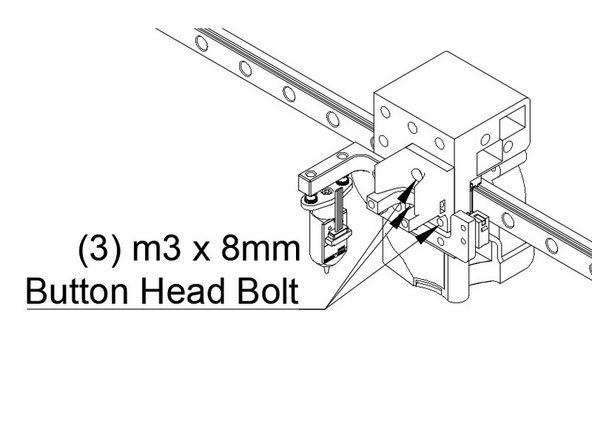
Attach the hotend mount to the Y carriage using (3) m3 x 8mm button head bolts.
-
-
-
BMG Mount Installation
-