Difficulty
Moderate
Steps
12
Time Required
- C) Top Extrusions Assembly 12 steps

In Progress
This guide is currently being written. Reload periodically to see the latest changes.
Quiz
0
-
-
Lay Out Top Extrusions as pictured
-
It can be helpful to use masking tape to add a label to the top of each extrusion indicating which it is (Top Back, Top Left, etc)
-
Be sure the Corner cubes have a larger hole facing up, smaller hole facing down.
-
-
-
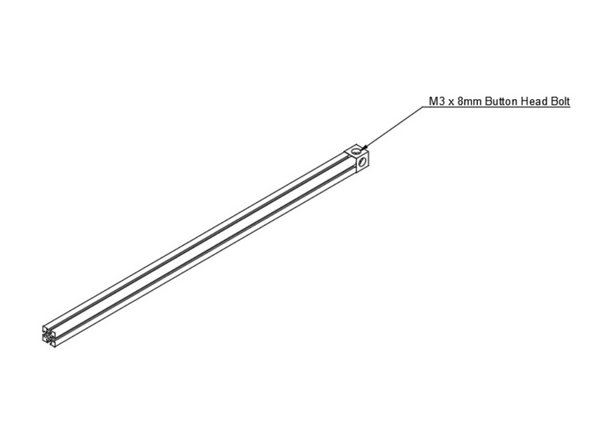
Bolt Corner Cube to Top Left 425mm Extrusion using (1) 8mm Button Head Bolt
-
Note on the corner cube, the small hole is pointing to the right in this image
-
-
-
Hold the Extrusion as it will be oriented on the printer (make sure the big hole on the corner cube faces up)
-
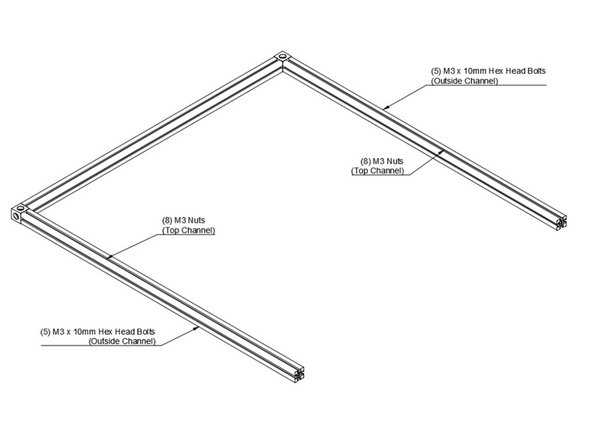
Slide (8) M3 nuts into the top channel
-
Slide (5) M3 x 10mm Hex Head Bolts in the outside channel
-
Slide (4) M3 nuts in the inside channel
-
Slide (6) M3 x 16mm Hex Head bolts in the bottom channel
-
Note on the corner cube, the small hole is pointing to the right in this image
-
-
-
Attach Second Corner Cube to Top Left Extrusion, be sure the large hole is up, small hole is down.
-
Note on both corner cubes, the small hole is pointing to the right in this image
-
-
-
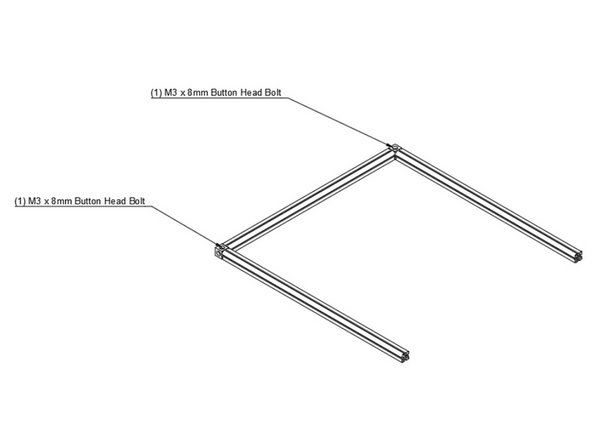
Attach Top Front and Top Back Extrusions using (1) M3 x 8mm Button Head Bolt each.
-
-
-
Add Hardware to Top Front and Top Back Extrusions
-
-
-
Use a bit of masking tape to keep your carriage from sliding off your linear rail.
-
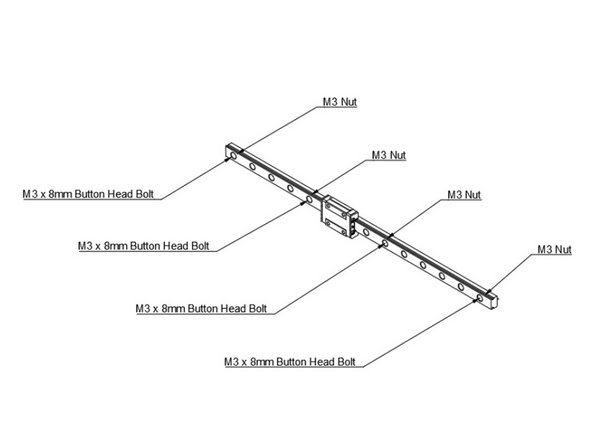
Select 4 evenly spaced holes in your linear rail.
-
Install (4) M3 x 8mm Button Head Bolts & (4) M3 nuts in the holes selected. DO NOT TIGHTEN THEM FULLY. The M3 nut only needs to be threaded onto the tip of the bolt, you want a gap between the nut and the back of the rail.
-
-
-
Attach Linear rail to Top Front and Top Back Extrusions by sliding the M3 nuts into the inside channel on the extrusion.
-
Roughly center the extrusion, and then snug up the bolts.
-
Do not overtighten the bolts, you just need them snug for now. They'll be tightened later.
-
-
-
Set aside the rest of your top extrusion assembly for now, so we can work on the top right extrusion.
-
Attach a corner cube to the right 425mm extrusion using (1) M3 x 8mm button head bolt
-
-
-
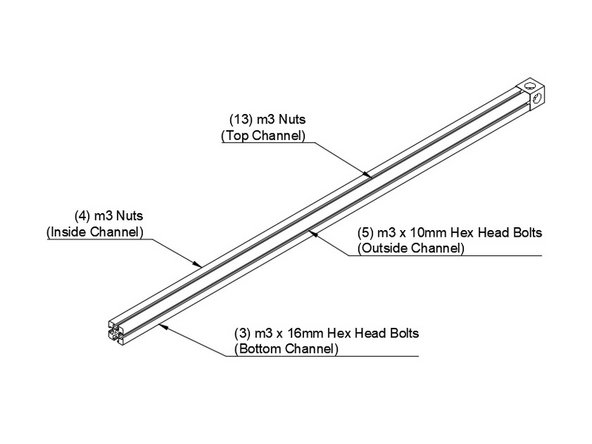
Slide (13) M3 nuts into the top channel
-
Slide (4) M3 nuts into the inside channel
-
Slide (5) M3 x 10mm Hex Head Bolts into the outside channel
-
Slide (3) M3 x 16mm Hex Head Bolts into the bottom channel
-
Be sure the orientation of the corner cube is correct. A large hole should face up, a small hole should be facing down, and a small hole should be facing towards the inside channel
-
-
-
Attach Second Corner Cube to Top Right Extrusion
-
-
-
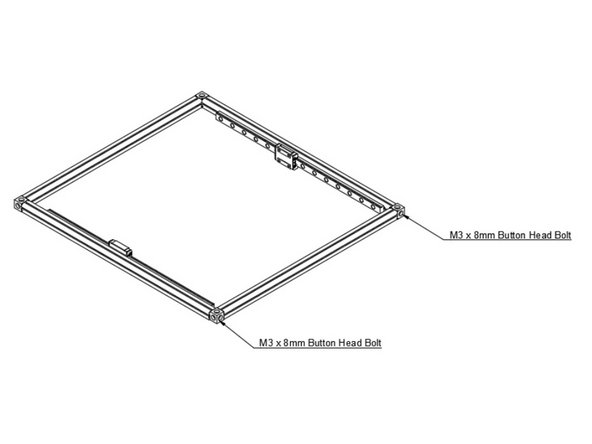
Attach Top Right Extrusion to the rest of the Top Extrusion Assembly using (2) M3 x 8mm button head bolts
-