Difficulty
Moderate
Steps
8
Time Required
- L) X/Y Belts 8 steps

In Progress
This guide is currently being written. Reload periodically to see the latest changes.
Quiz
0
-
-
To install a belt into a belt clip, put the belt through the clip, and leave a bit of a tail - about an inch or so, to allow some adjustment later.
-
-
-
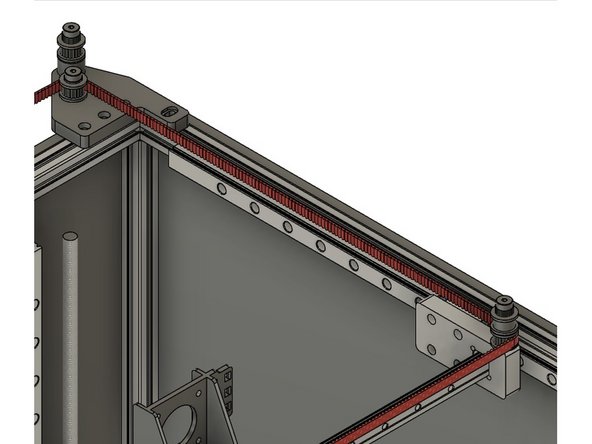
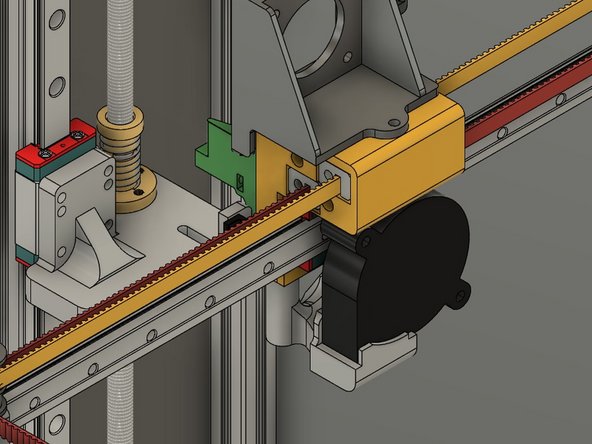
Start with the front or "X" belt. Insert the clip with the belt on it into the lower left hole at the front of the Y carriage. Make sure the bolt hole lines up properly.
-
Attach the clip using (1) m3 x 45mm cap head bolt and (1) m3 washer.
-
The Belt teeth should be facing the rear of the printer.
-
-
-
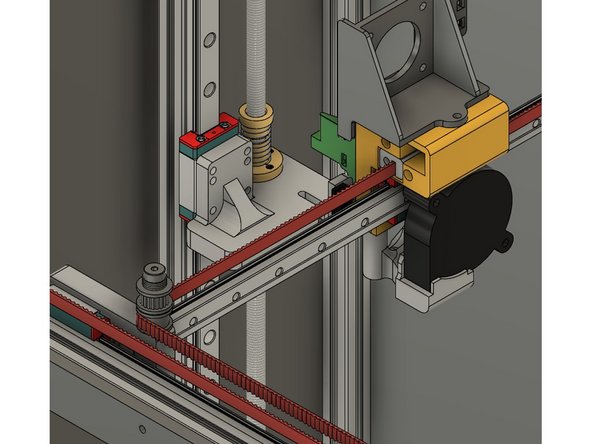
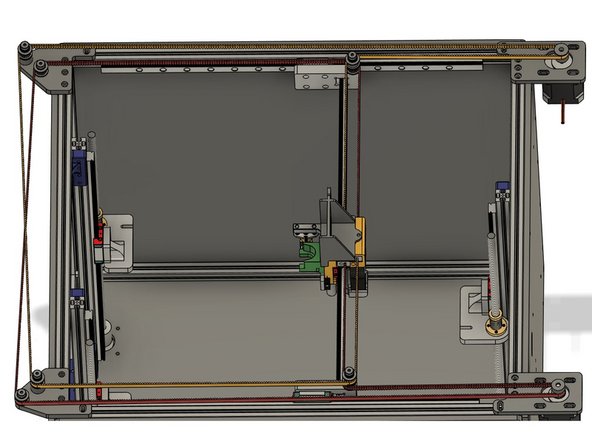
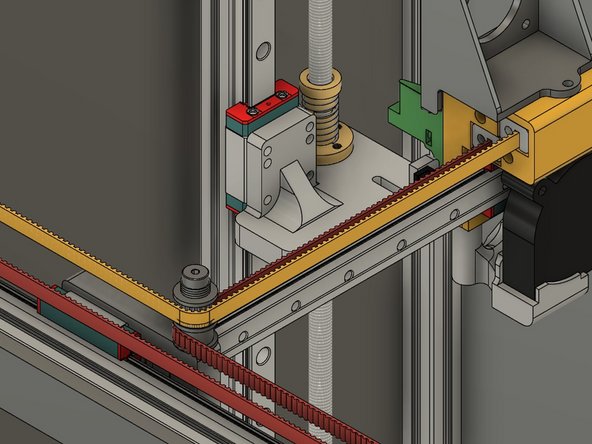
The belt (shown in red) should go from the Y carriage and then around the lower smooth idler on the front X carriage.
-
From the idler the belt should turn to the right and loop around the front stepper pulley.
-
The teeth should engage the pulley.
-
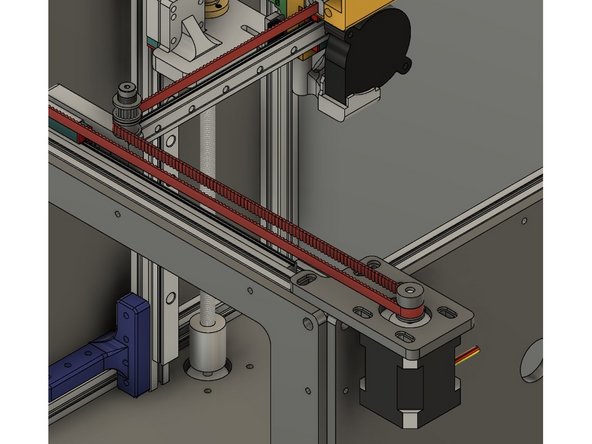
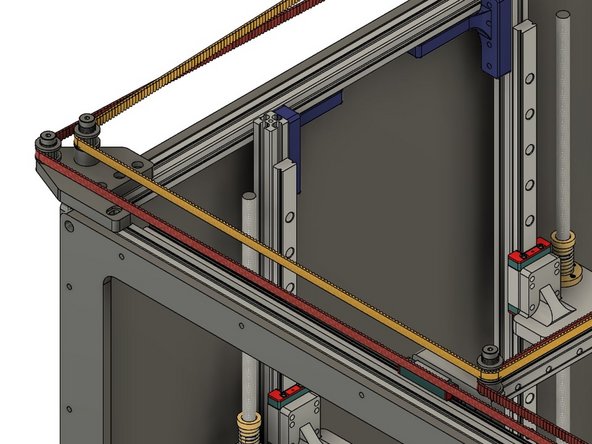
From the stepper the belt goes across the front of the printer and around the toothed idler on the outside, shorter shoulder bolt.
-
-
-
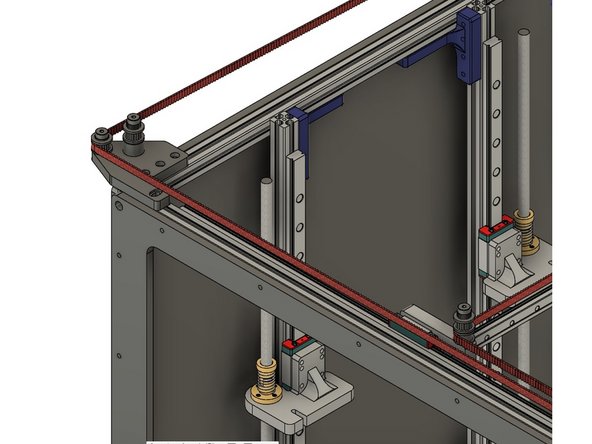
The belt should cross to the left of the printer, and the teeth should engage the toothed idler on the shorter, inside shoulder bolt on the rear idler mount.
-
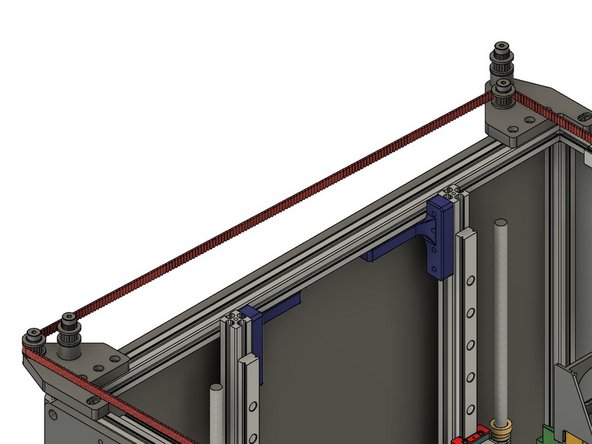
From there the belt should follow along the back of the printer, with the toothed side wrapping around the lower toothed idler on the X carriage.
-
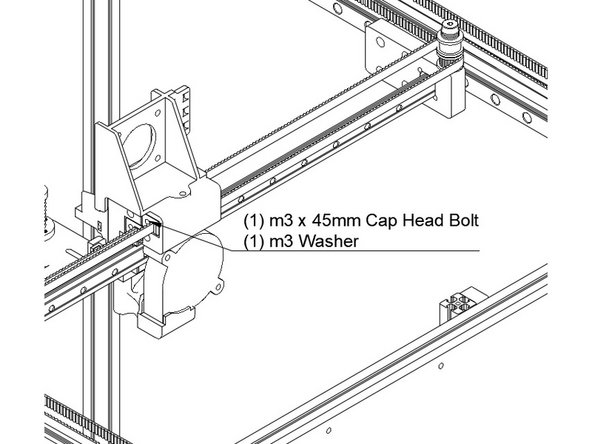
Put another belt clip on, and insert the bolt into the lower rear hole on the Y carriage. Attach it with (1) m3 x 45mm bolt and (1) m3 washer.
-
Be sure the belt is properly seated around the idlers and pulley, and not twisted along its length.
-
Don't worry about the belt being tight - we'll tension it later. For now "close" is good enough.
-
Cut the belt, leaving an approximately 1" tail in case you need to adjust it.
-
-
-
To install the rear or "Y" belt, start by installing a belt clip on the end of the belt, and insert it into the top hole on the front of the Y carriage.
-
Attach the belt clip using (1) m3 x 45mm cap head bolt and (1) m3 washer.
-
The belt teeth should be facing the rear of the printer.
-
-
-
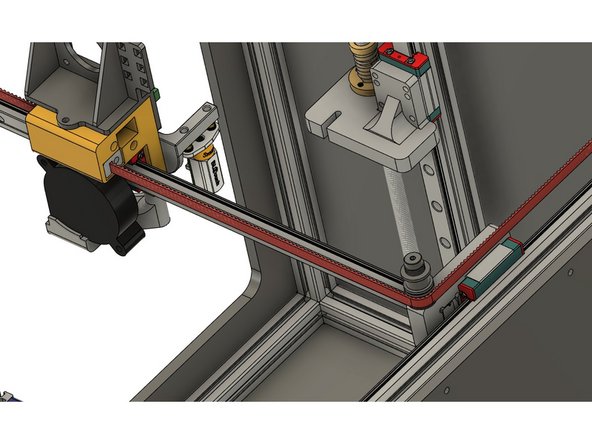
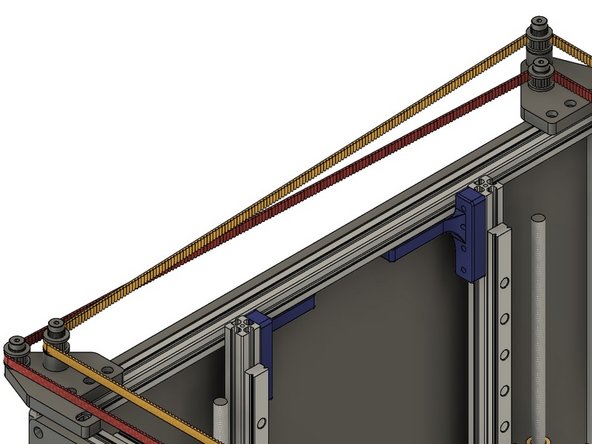
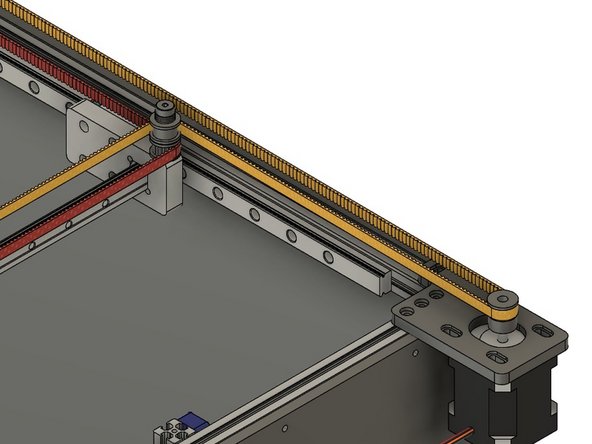
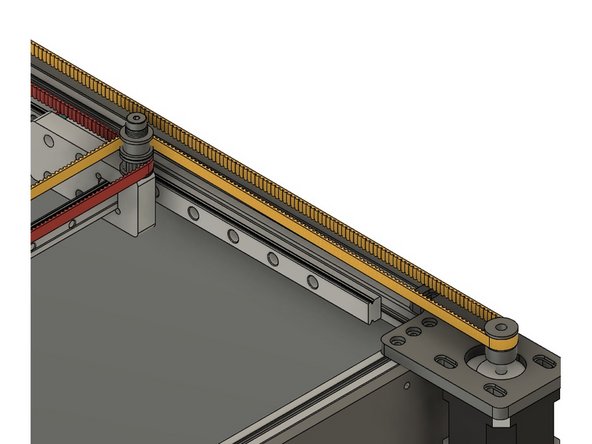
To route the belt it should leave the Y carriage and wrap around the toothed idler at the top of the stay on the front X carriage.
-
From the X carriage the belt follows along the front of the printer to the toothed idler at the top of the tall stack on the front idler mount.
-
-
-
The belt crosses the left side of the printer, to the toothed idler on the tall stack of the rear idler mount.
-
From the rear idler mount the belt extends along the back of the printer, all the way to the rear stepper pulley.
-
The belt wraps around the rear stepper pulley, and goes back to the rear X carriage, with the back of the belt against the smooth idler at the top of the rear X carriage idler stack.
-
-
-
Insert wisdom here.
-