Introduction
It's assumed that you're building a kit from Filastruder, and you've completed all previous sections. At the end of this section you should have your Z axis attached to your frame assembly.
-
-
Newer Filastruder kits use Socket Cap Head Screws, use them in place of all button head screws in this section.
-
-
-
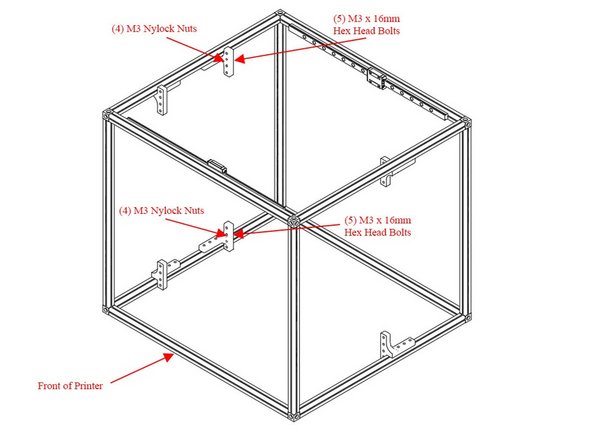
Find the Z brackets in the parts and align each as follows.
-
Note the orientation of each bracket. It is CRITICAL that the brackets all face the correct way.
-
On the left, the long horizontal ends of the brackets point towards each other. The vertical ends of the brackets face out towards the front and back of the frame
-
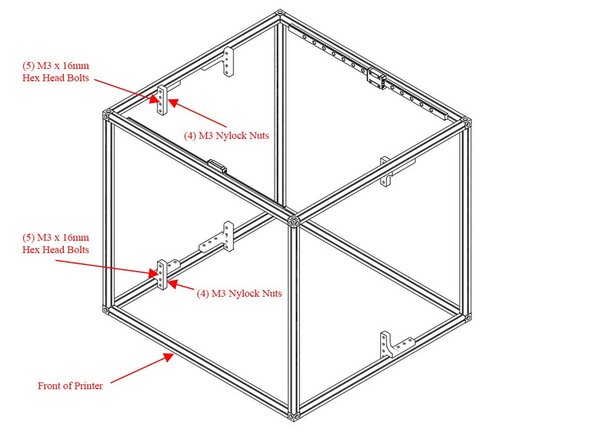
On the right the vertical ends of the brackets face the front of the frame.
-
Loosely install each Z bracket using (3) M3 Nylock Nuts.
-
-
-
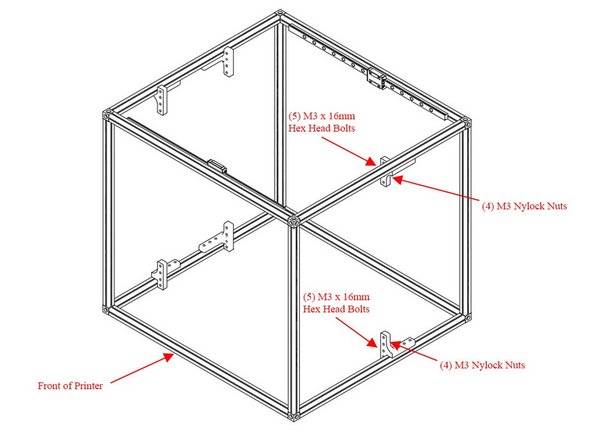
Put a M3 x 16mm hex head bolt through each Z Bracket and attach it loosely with an M3 nylock nut. Only thread the nut on loosely. Each bracket gets (4) M3 x 16mm hex head bolts with (4) M3 nylock nuts.
-
Repeat this process for all (6) Z brackets.
-
-
-
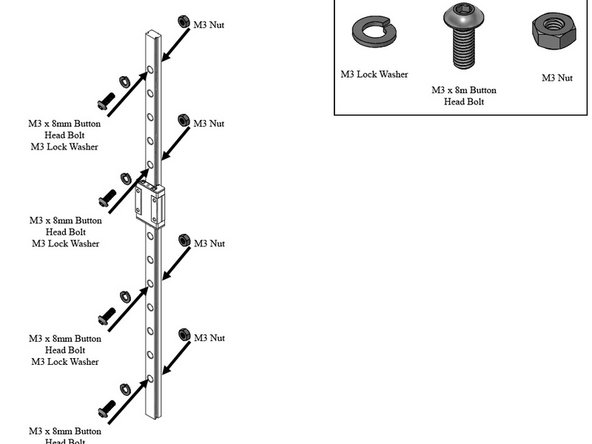
Prep the Z axis MGN12 linear rails in the same fashion as the X axis rails. There are additional hex head bolts in the ZLT supplement bag. These can be merged in with the rest of your hardware.
-
Select 4 evenly spaced holes in the rail. Place a lock washer on (1) M3 x 8mm button head bolt, and place it into the rail. Loosely thread on (1) M3 nut to the bolt.
-
For the ZLT you should use (8) bolts spaced evenly, instead of (4) per rail. Extra 8mm bolts are located in the ZLT supplemental hardware bag.
-
Repeat for all (3) Z linear rails.
-
It is highly recommended to use a bit of masking tape to keep the carriage from sliding off of the linear rail.
-
-
-
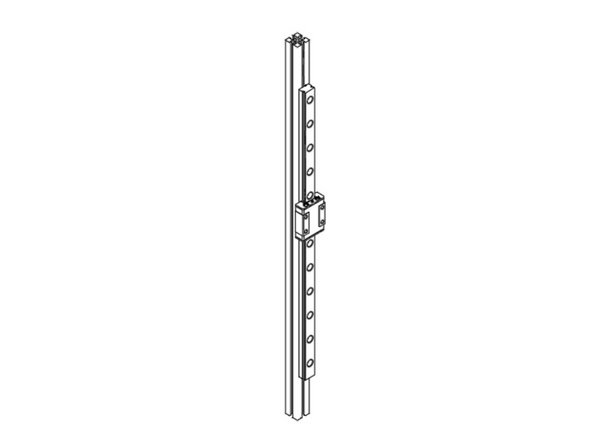
Slide the linear rails onto the (3) 445mm Z extrusions, and snug up the bolts (do not overtighten them.
-
It is highly recommended to use a bit of masking tape to keep the carriage from sliding off of the linear rail.
-
-
-
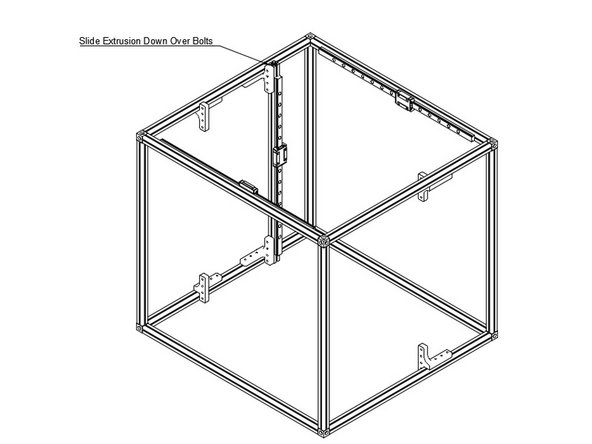
Take your Z extrusion with a linear rail attached, and slide it down onto the hex head bolts you added earlier on the Z brackets.
-
The extrusion should attach to all 4 bolts on both the top & bottom Z brackets.
-
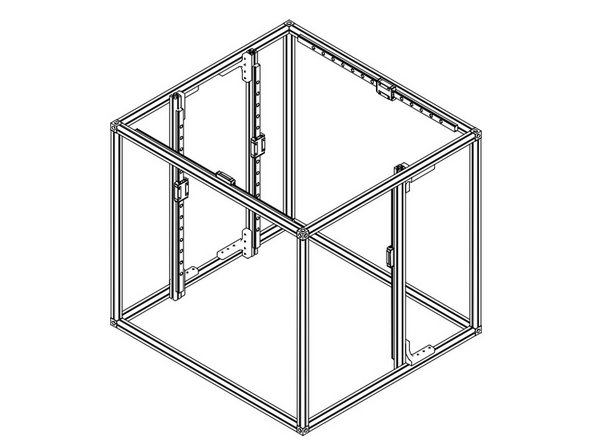
Tighten down the nylock nuts to hold the Z extrusions in place.
-
Repeat for all (3) Z extrusions.
-